Table of Content
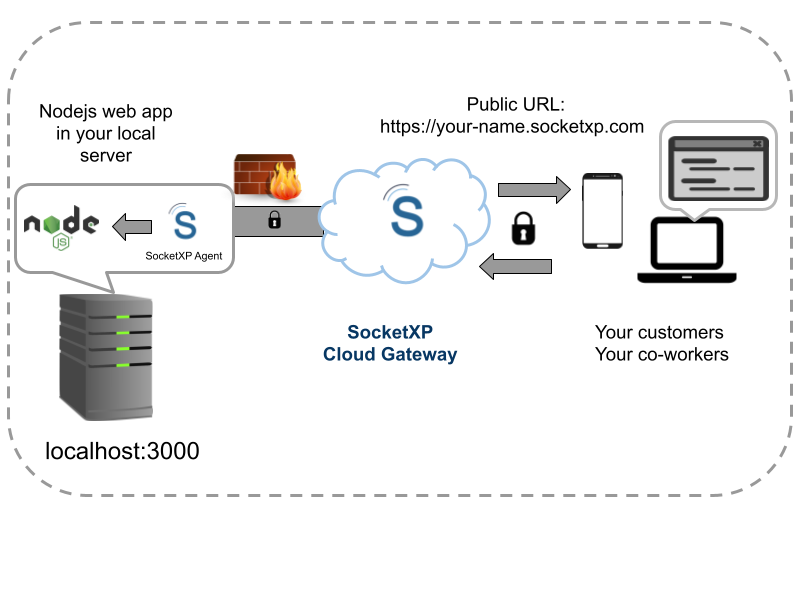
Table of Content
Let’s assume you have a nodejs web application that runs in your personal laptop or in a server or in a Raspberry Pi in your office LAN network.
Anyone outside of your office network cannot access the web application because the application runs in your local network.
Suppose you want to expose the web application to the internet, so that your customers or remote employees can access it from anywhere in the world.
Today, there are two ways to expose your application to the internet.
- Deploy the web application in your office server which has a public IP address and domain name.
- Deploy the web application in the cloud such as AWS, MS Azure, GCP or web hosting companies like GoDaddy, SiteGround, A2Hosting etc.
Both of the above options cost more money in terms of purchasing your own IP address, domain name, configuring and managing them.
Moreover, you need to pay the monthly usage based fees if you run the web application in any cloud server.
To address the above problems and provide an alternate cost-effective solution, we have created SocketXP.
What is SocketXP
SocketXP is a simple, quick and cost-effective way to deploy your web application online.
How it works?
- Run your web application in any server or laptop in your office LAN network.
- Download SocketXP Client and install in the office server or laptop
- SocketXP Client will create a secure tunnel from your server to the SocketXP Cloud Service.
- SocketXP Cloud Service will provide a public tunnel endpoint (Public IP address and port) that you can use to access your nodejs web application from the internet.
A Quick Demo:
Let’s use the following simple nodejs web application for the demo.
$ cat myapp.js
var http = require('http');
//create a server object:
http.createServer(function (req, res) {
 res.writeHead(200, {'Content-Type': 'text/html'});
 res.write("<h2>Hello World!</h2>"); //write a response to the client
 res.end(); //end the response
}).listen(3000); //the server object listens on port 3000
$
Run the myapp.js on a local server or laptop.
$ node myapp.jsUsing a browser, let’s point to http://localhost:3000 to connect to the web application.
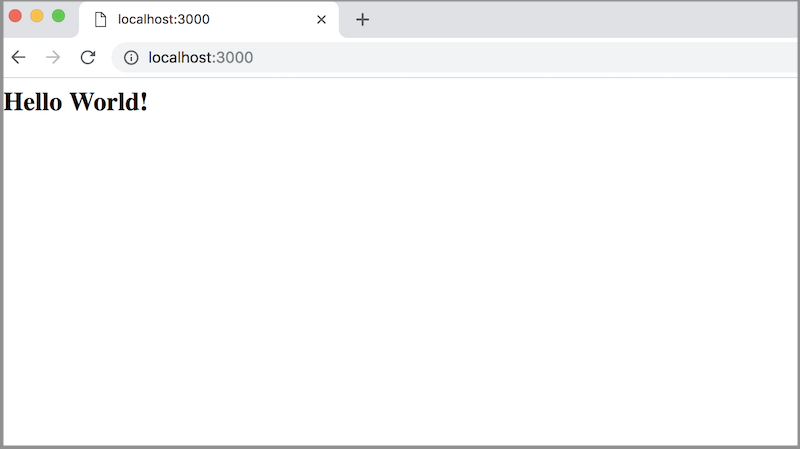
Right now the web application can be accessed only by you because it runs on your laptop.
Now to make the nodejs web application accessible from the internet, let’s download and run the SocketXP Client from the download page.
Next authenticate and register the SocketXP Client with the SocketXP Cloud Gateway, using the auth-token from the Portal Page
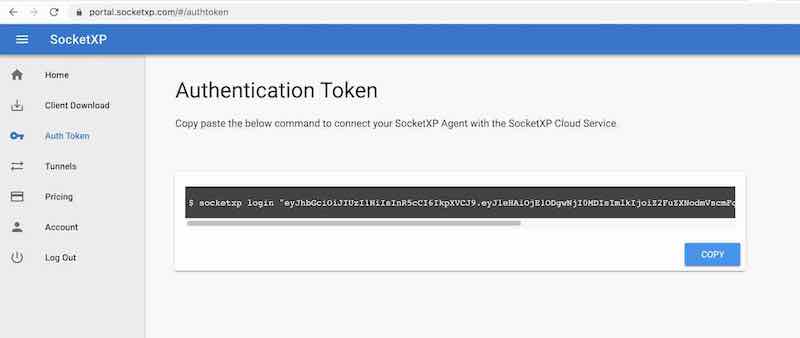
Click the copy button to copy the command string and paste it in the terminal window in your laptop or server.
$ socketxp login "eyJhbGciOiJIUzI1NiIsInR5cCI6IkpXVCJ9..."
After registering the SocketXP Client with the SocketXP Cloud Service, you could create HTTP proxy tunnel between the application running in your laptop and the SocketXP Cloud Service, via the SocketXP Client.
As our nodejs app is a web application(HTTP server), let’s create a HTTP proxy tunnel.
Use the following command to create a HTTP proxy tunnel between the nodejs web application and the SocketXP Cloud Service.
$socketxp connect http://localhost:3000
Public URL -> https://679aa48b-1162-44f7-b6c6-59129dd68b58.socketxp.com
Let’s access the nodejs web application from the internet using the SocketXP Public URL provided in the above output.

You could now share the above link with your customers or remote employees, so that they could access your web application from anywhere in the world.
The above SocketXP public URL is a permanent link just assigned to you and it doesn’t change until you manually delete it from the HTTP tunnels section in the portal.
Next Steps:
- Setup remote access to a NodeJS based Node-RED server running in your Raspberry Pi or IoT device: Remote Access Node-RED Server