
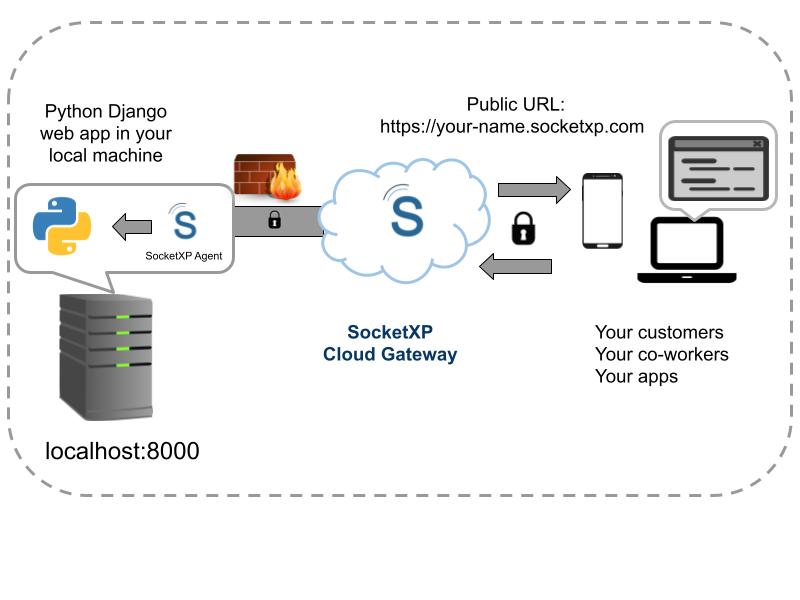
In this article, we’ll discuss how to remote access a Django web app server from the internet by creating a random public web URL for your Django application using SocketXP’s HTTP Web Service Remote Access solution.
We’ll walk through each step in detail, plus how to address the Django-specific errors (DisallowedHost, CSRF verification failed) you’re likely to hit along the way.
Expose your Django server to the Internet in 3 steps:
- Run Django on all interfaces:
python manage.py runserver 0.0.0.0:8000 - Install SocketXP and run
socketxp connect http://localhost:8000to get a permanent public HTTPS URL like: https://my-django-app-abc123xyz.socketxp.com - Add the generated hostname to
ALLOWED_HOSTSinsettings.py(andCSRF_TRUSTED_ORIGINSif your app has forms)
- No port forwarding, no static IP, no VPN - just a public URL Django will actually accept requests on.
Let’s assume you have a Django web server application that listens on localhost IP address 127.0.0.1 on your personal laptop, a server, or a Raspberry Pi in your home or office network, behind a NAT router or firewall.
Anyone outside of your home or office network cannot access the Django web application, because it’s bound to your local network or local IP address 127.0.0.1. Local IP addresses such as 127.0.0.1, 0.0.0.0, 10.1.1.1 or 192.168.1.1 etc., cannot be accessed from the internet.
Let’s say you want to expose the Django app to the internet or make it externally visible, so that your colleagues, customers, or a remote person or app can access it from anywhere.
Remotely Access Django Web App in 3 Ways
Today, there are three ways to expose your Django web application to the internet.
- Deploy the Django app on an externally visible production server, such as your office server, which has an internet-facing public IP address and domain name.
- Deploy the web application on a cloud platform such as AWS, MS Azure, Google Cloud Platform, or Digital Ocean as a Docker container, Virtual Machine, or app platform that comes with a public IP address.
- Run the Django app on your laptop and simply create a public web URL for it using SocketXP.
The first two options cost more money and require more effort in terms of purchasing your own IP address, domain name, and configuring and managing infrastructure in the cloud.
To address the above problems and provide an alternate cost-effective solution, we have created SocketXP.
In this article, we’ll discuss in detail how to create a permanent and unique public web URL for your Django app using SocketXP Web Service Remote Access Solution.
What is SocketXP
SocketXP is a cloud based web service remote access platform. It is a simple, quick and cost-effective way to deploy your web application online and get a permanent random public web URL.
How it works?
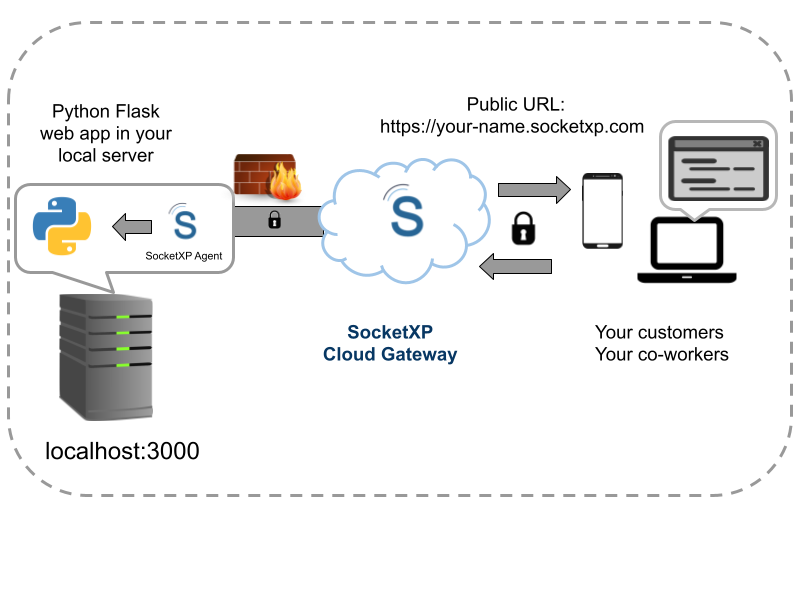
- Run your Django web application on any server or laptop using localhost IP address 127.0.0.1.
- Download the SocketXP Client and install it on the same machine.
- The SocketXP Client creates a secure SSL/TLS encrypted tunnel from your server to the SocketXP Cloud Gateway.
- The SocketXP Cloud Service provides a secure public web URL (HTTPS URL) that you can use to access your Django web application from anywhere.
A Simple Django Web App Example - Quick Demo:
Let’s use the following minimal Django application for our demo. There’s no need for a separate app module here, we can define the view directly in the project’s urls.py to keep things simple.
$ python3 -m pip install django
$ django-admin startproject myproject
$ cd myproject
By default, manage.py runserver listens on localhost IP address 127.0.0.1 and TCP port 8000. We’ll keep Django’s default port for this demo.
$ cat myproject/urls.py
from django.http import HttpResponse
from django.urls import path

def hello_world(request):
    return HttpResponse('<h2>Hello World!</h2>')

urlpatterns = [
    path('', hello_world),
]
Run the Django App
Run the app on a local server or laptop using the following command:
$ python3 manage.py runserver
Watching for file changes with StatReloader
Performing system checks...

System check identified no issues (0 silenced).
Django version 5.0, using settings 'myproject.settings'
Starting development server at http://127.0.0.1:8000/
Quit the server with CONTROL-C.
Access the Django Web App Locally
Using a browser, let’s point to http://localhost:8000 to connect to the Django web application.
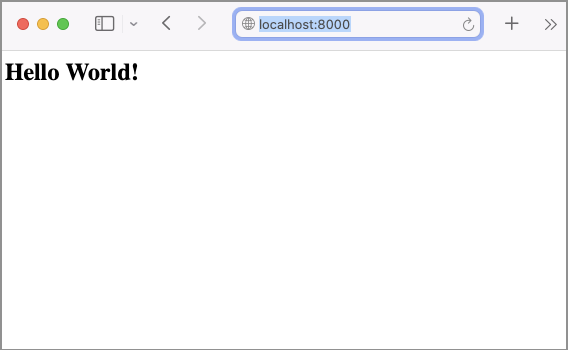
Right now the Django application can be accessed only by you, because it runs on your laptop.
Download and install SocketXP client
Now, to make the Django application accessible from the internet, let’s download and run the SocketXP client from the download page.
Next, login to the SocketXP Web Portal for free to get your authtoken.
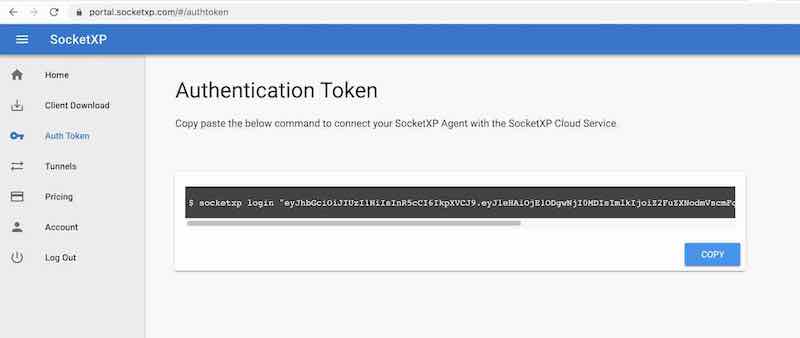
Click the copy button to copy the authtoken and paste it into the terminal window on your laptop or server.
Next, authenticate and register the SocketXP client with the SocketXP Cloud Gateway, using the auth-token as shown below:
$ socketxp login "eyJhbGciOiJIUzI1NiIsInR5cCI6IkpXVCJ9..."
After registering the SocketXP Client with the SocketXP Cloud Service, you can create an HTTP proxy tunnel between the application running on your laptop and the SocketXP Cloud Service, via the SocketXP Client.
As our Django app is a web application (HTTP server), let’s create an HTTP proxy tunnel.
Expose Django App to the internet
Use the following command to create an HTTP proxy tunnel between the Django web application and the SocketXP Cloud Gateway. This will generate a public web URL. Use the SocketXP public web URL to expose your Django app to the internet.
$ socketxp connect http://localhost:8000

Public URL -> https://679aa48b-1162-44f7-b6c6-59129dd68b58.socketxp.com
If you try opening this URL right now, Django will most likely reject it with a [DisallowedHost] error, that’s expected, and we’ll fix it in the debugging section below, since it’s the one thing Flask doesn’t make you deal with.
But, as a quick fix and for local testing purposes only (never use this in production), set ALLOWED_HOSTS = ['*'] in your project’s settings.py file to skip the check entirely, as shown below.
# myproject/settings.py
ALLOWED_HOSTS = ['*']
Let’s access the Django web application from the internet using the SocketXP Public URL provided in the above output.
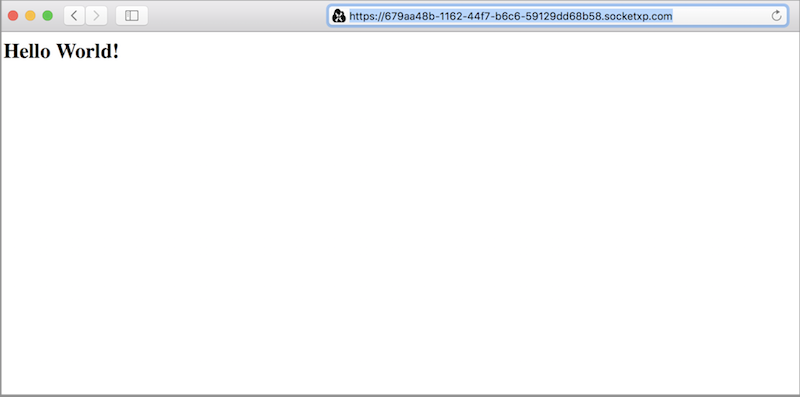
You could then share the public web URL link with your customers or remote employees, so that they could access your web application from anywhere in the world.
The above SocketXP public URL is a permanent link just assigned to you, and it doesn’t change until you manually delete it from the HTTP tunnels section in the SocketXP web portal.
Debugging Django Web App Remote Access Issues
Here are some common problems encountered while developing, testing and deploying your Django web app for the first time:
Django app not accessible from remote machine or across networks
By default, a Django application started with manage.py runserver will listen on the localhost IP address 127.0.0.1. This IP address is not externally visible to other machines in your local network. The app can only be accessed from the same machine it’s running on.
You need to change how you start the Django server to listen on the network IP address of your machine, such as 192.168.X.X, 10.1.X.X etc., or use the anycast IP address 0.0.0.0. The anycast IP address 0.0.0.0 makes Django listen on all IP addresses on the machine and accept incoming connections from any network interface (loopback, ethernet, wifi), regardless of its IP address.
$ python3 manage.py runserver 0.0.0.0:8000
Hint: Anycast IP address 0.0.0.0 is equivalent to using *.*.*.* in the IP address field, where * means match any string or number.
What is Localhost IP address 127.0.0.1?
Localhost IP address or Loopback IP address 127.0.0.1 belongs to the Loopback interface of your system, a software network interface created automatically by the OS. Only programs running on your laptop or server (a web browser, for example) can connect to a Django server listening on 127.0.0.1. Other machines on your local network cannot.
It’s useful for developing and testing locally, but not suitable for exposing your web application to any other external machine, including devices on your own local network.
We cover this in more depth, with ifconfig/ipconfig and ping examples, in How to Remote Access Python Flask Web App from Internet, the same networking concepts apply to Django unchanged.
How to connect to Django Web App in my local network
If you want other machines on your local network (say, a colleague’s laptop) to connect to your Django app, run it on your machine’s local network IP address, such as 192.168.X.X or 10.1.X.X (assigned by your WiFi router), or use the anycast IP address 0.0.0.0:
$ python3 manage.py runserver 192.168.10.7:8000
Use ifconfig (Linux/macOS) or ipconfig (Windows) to find your machine’s local network IP address, and ping to confirm another machine can reach it.
Finally, if you want your Django app to be externally visible from the public internet, or from any outside network, you need a remote access solution such as the SocketXP Web Service Remote Access Solution discussed above.
Why does Django say “DisallowedHost”?
This is the error most people hit the moment they put a Django dev server behind a tunnel, and it doesn’t have a Flask equivalent. Django checks the Host header of every incoming request against the ALLOWED_HOSTS list in settings.py, and refuses anything not on that list:
django.core.exceptions.DisallowedHost: Invalid HTTP_HOST header:
'679aa48b-1162-44f7-b6c6-59129dd68b58.socketxp.com'. You may need to
add '679aa48b-1162-44f7-b6c6-59129dd68b58.socketxp.com' to ALLOWED_HOSTS.
Fix it by adding your SocketXP public hostname to ALLOWED_HOSTS in myproject/settings.py. Django’s ALLOWED_HOSTS supports a leading-dot wildcard for subdomains, so you can allow every SocketXP tunnel you create at once instead of updating this every time your public URL changes:
# myproject/settings.py
ALLOWED_HOSTS = ['127.0.0.1', 'localhost', '.socketxp.com']
For quick local testing only (never in production), you can also set ALLOWED_HOSTS = ['*'] to skip the check entirely.
Django CSRF verification failed over a public URL
If your Django app has any HTML forms, you may also hit this once DisallowedHost is fixed:
Forbidden (403)
CSRF verification failed. Request aborted.
Django’s CSRF middleware checks the request’s Origin header against CSRF_TRUSTED_ORIGINS, and a tunneled hostname isn’t trusted by default. Add your SocketXP domain to settings.py, using the same wildcard-subdomain syntax Django 4.0+ supports:
# myproject/settings.py
CSRF_TRUSTED_ORIGINS = ['https://*.socketxp.com']
Static files not loading once DEBUG is False
manage.py runserver only serves static files (CSS, JS, images) automatically while DEBUG = True. If you flip DEBUG to False for a more production-like test, run python manage.py collectstatic and serve the STATIC_ROOT directory yourself, or use a package like whitenoise, otherwise your page will load with the layout broken.
Django app remote access not working
The primary reason Django remote access doesn’t work is usually your WiFi router or firewall preventing inbound connections from outside your network.
You need to use a reverse proxy service like SocketXP Web Service Remote Access Solution, discussed above, to remotely access your Django app without having to manipulate your WiFi router settings or firewall rules.
REMOTE_USER Is Not the Same as Remote Access
It’s worth distinguishing network remote access, the subject of this guide, from Django’s REMOTE_USER feature, which is about authentication, not connectivity. REMOTE_USER lets Django trust a username supplied by a front-end web server or SSO layer (via RemoteUserMiddleware and RemoteUserBackend), typically in intranet setups using Apache with LDAP, CAS, or Kerberos. If you’re building an internal tool that sits behind a corporate SSO proxy, it’s worth a read in the official Django documentation on REMOTE_USER authentication, but it won’t help you reach a dev server that isn’t network-accessible in the first place.
Remote Accessing the Django Admin Panel or a DRF API
The same public URL works for Django’s built-in /admin/ panel or a Django REST Framework API, since SocketXP is tunneling the whole app, not a single route. Just make sure the fixes above are in place first: your SocketXP hostname in ALLOWED_HOSTS, and, if you’re logging into /admin/ (which submits a form), your SocketXP domain in CSRF_TRUSTED_ORIGINS too. Once both are set, you can log into the Django admin, or call a DRF endpoint, from anywhere over the public HTTPS URL, useful for sharing a staging build with a client or teammate without deploying anywhere.
Private Access to Your Django App (No Public URL)
If you’d rather not expose your Django app on a public HTTPS URL at all, not even one with a random, hard-to-guess hostname, SocketXP’s Slave Mode (also called Local Proxy mode) lets you reach it privately instead. Your Django server connects to the SocketXP Cloud Gateway as a TCP service, and only a second SocketXP agent, authenticated to your own account and run on your laptop or teammate’s machine, can open a local proxy port to it. There’s no public hostname involved at any point.
This is worth reaching for when you’re sharing a Django admin panel or an internal staging build with a teammate, and a public link, even a private one, is more exposure than you want.
See the official SocketXP IoT Slave Mode guide for the full setup and command reference.
Security Checklist Before You Expose Django
Django’s own documentation is explicit that the development server “has not gone through security audits or performance tests” and isn’t meant for production traffic. Whichever method you use, keep these in mind:
- Never run with
DEBUG = Trueon anything reachable from outside your machine. Debug mode leaks settings, stack traces, and source code to anyone who triggers an error page. - Set
ALLOWED_HOSTSprecisely once you’re done testing.['*']accepts any Host header and should only be temporary. - Don’t leave tunnels or
0.0.0.0bindings running unattended. Close the tunnel or stop the server when you’re done sharing it. - Prefer tools that don’t require inbound firewall rules or router changes. Every open port is a standing attack surface; outbound-only tunnels like SocketXP avoid that entirely.
- Use HTTPS-terminated URLs for anything involving forms, logins, or webhooks. Plain HTTP dev servers should never handle real credentials over the open internet.
- For anything long-running, move to a real stack — Gunicorn or uWSGI behind Nginx — rather than relying on
runserverat all.
Flask vs Django: Which One Should You Use?
Django isn’t the only Python web framework out there. Flask is the other major option, and it takes a pretty different approach: a minimal micro-framework, compared to Django’s full-stack, batteries-included philosophy. If you’re trying to decide which one to build your next project on, check out the full breakdown of architecture, ORM, admin panel, REST APIs, learning curve, and when to pick each, in Flask vs Django: Which Python Web Framework Should You Use?
Whichever framework you choose, exposing it to the internet with SocketXP works exactly the same way. Only the default port differs, and Django adds the ALLOWED_HOSTS/CSRF step:
| Flask | Django | |
|---|---|---|
| Default dev server command | python3 myapp.py | python manage.py runserver |
| Default port | 5000 | 8000 |
| Listen on all interfaces | app.run(host='0.0.0.0') | runserver 0.0.0.0:8000 |
| Extra step for a tunnel/public URL | None | Add hostname to ALLOWED_HOSTS (and CSRF_TRUSTED_ORIGINS for forms) |
See How to Remote Access Python Flask Web App from Internet if you’re working with a Flask app instead.
Frequently Asked Questions
Why can't I access my Django server from another device or the internet?
By default, `python manage.py runserver` binds only to 127.0.0.1 (localhost), which is reachable only from the same machine it's running on. To let other devices on your network connect, run it on 0.0.0.0 or your machine's local IP. To reach it from outside your home or office network entirely, say from the internet, you'll need a tunnel or remote-access service like SocketXP, since your router (WiFi, Cellular, or Satellite) won't forward inbound traffic to it by default.
Why do I get a 'DisallowedHost' error when accessing Django remotely?
Django checks every incoming request's Host header against the ALLOWED_HOSTS list in settings.py, and rejects anything not on it with a DisallowedHost exception. This is Django's own protection against HTTP Host header attacks, and it's not something Flask does out of the box. When you expose your app with a tunnel like SocketXP, you need to add the generated hostname (or a wildcard like '.socketxp.com') to ALLOWED_HOSTS before the public URL will work.
What is ALLOWED_HOSTS and how do I configure it for remote access?
ALLOWED_HOSTS is a Django setting in settings.py, a list of hostnames your app will accept requests for. For local testing you can set it to ['*'] to allow any host, but that's not something you'd want in production. A safer approach for a SocketXP tunnel is ALLOWED_HOSTS = ['127.0.0.1', 'localhost', '.socketxp.com'], the leading dot matches any subdomain, which covers your generated public URL automatically.
Why does manage.py runserver only listen on 127.0.0.1 by default?
It's a deliberate default. Django's development server assumes you're working locally unless told otherwise, so it binds to the loopback interface only. Run `python manage.py runserver 0.0.0.0:8000` to make it listen on every network interface on the machine, which is the first step before exposing it further with a tunnel.
What's the difference between 127.0.0.1, 192.168.x.x, and 0.0.0.0 for Django?
127.0.0.1 is the loopback address, accessible only from the same machine. 192.168.x.x or 10.x.x.x is your private local network (LAN) address, reachable by other devices on the same WiFi or router. 0.0.0.0 isn't a destination address at all, it's an instruction telling manage.py runserver to listen on every network interface on the machine at once.
How do I fix 'CSRF verification failed' when accessing Django through a public URL?
This happens because Django's CSRF middleware checks the Origin (or Referer) header on POST requests against CSRF_TRUSTED_ORIGINS, and a tunneled hostname like your SocketXP public URL isn't trusted by default. Add it to settings.py: CSRF_TRUSTED_ORIGINS = ['https://*.socketxp.com']. Django 4.0 and later support the wildcard subdomain syntax shown here, so you don't need to update this every time you create a new tunnel.
Is it safe to expose Django's built-in dev server to the internet?
For quick sharing, demos, or testing, yes, especially behind a tunnel like SocketXP, which doesn't open any inbound firewall ports and gives you an encrypted HTTPS connection. That said, `manage.py runserver` itself is single-threaded and not hardened for sustained production traffic, so for a real deployment you'd still put Django behind a production WSGI server like Gunicorn, with DEBUG=False and ALLOWED_HOSTS locked down to specific hosts rather than a wildcard.
What's the best way to put a Django app online?
For development, quick sharing, testing, or demos, a tunneling service like SocketXP gives you a permanent public HTTPS URL in seconds, with no server, domain, or router configuration needed. For a production deployment, you'd typically run Django behind Gunicorn or uWSGI on a cloud server, with DEBUG=False, a locked-down ALLOWED_HOSTS, and static files collected via collectstatic. SocketXP is the secure, faster, zero-infrastructure option when you just need your Django app reachable right now.
Does the SocketXP public URL change every time I restart Django?
No. The generated public URL is persistent and stays assigned to you until you manually delete the tunnel from the SocketXP portal, so you only need to add it to ALLOWED_HOSTS and CSRF_TRUSTED_ORIGINS once.
How is SocketXP different from ngrok for Django apps?
Both create a public HTTPS tunnel to a local port, so for a single Django app the core function is similar. SocketXP is built to also handle longer-term IoT and device-fleet remote access, secure SSH/VNC/RDP tunneling, and centralized management, useful if you'll be exposing more than just one Django app over time.