
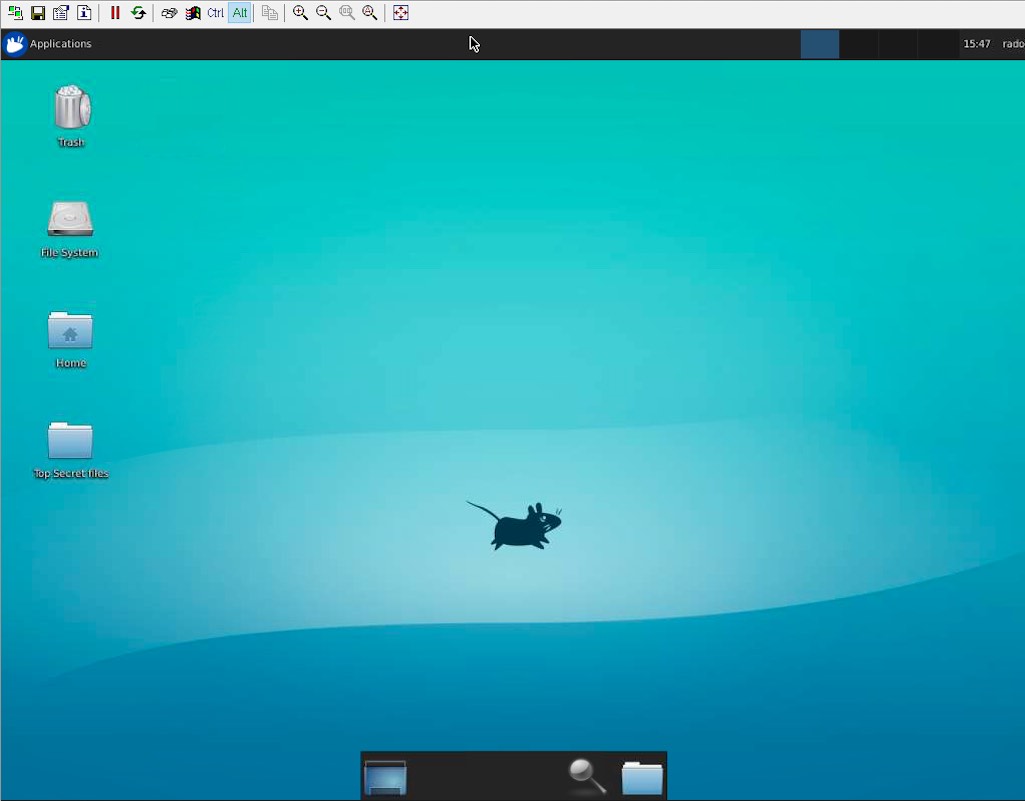
Raspberry Pi’s full desktop environment is a powerful interface for running GUI applications, configuring settings, and debugging complex projects—but reaching that desktop remotely over the internet is non-trivial when the Pi sits behind a NAT router, corporate firewall, or carrier-grade NAT (CGNAT). This guide covers the VNC path; for the full overview of all Raspberry Pi remote access methods, see the SocketXP solution page.
Set up VNC remote desktop in 4 steps:
- Enable VNC on your Raspberry Pi via
sudo raspi-config(Interface Options > VNC) — it listens on port 5900 - Install SocketXP agent on the Pi and run
socketxp connect tcp://localhost:5900to create a secure outbound tunnel - Run SocketXP in slave mode on your laptop to create a local proxy endpoint (e.g.,
localhost:10000) - Open your VNC viewer (TightVNC, RealVNC, or macOS Screen Sharing) and connect to
localhost:10000
No port forwarding, no static IP, no VPN server to manage — the tunnel handles NAT and CGNAT transparently.
This guide covers both the RealVNC Server (pre-installed on Raspberry Pi OS Desktop) and TightVNC Server (for Raspberry Pi OS Lite with a manually installed desktop environment). The SocketXP tunneling layer is identical for both.
The Core Architecture Challenge
VNC operates on TCP port 5900 (display :0) or 5901 (display :1). Direct VNC access from the internet requires the router to forward inbound TCP traffic on these ports to the Pi’s local IP—a configuration that:
- Is impossible when the ISP uses CGNAT (your router itself has no public IP)
- Exposes the VNC service to the open internet, where port scanners and brute-force bots are routine
- Breaks whenever the router’s public IP changes (no static IP)
- Requires firewall ACL changes in corporate or campus environments
SocketXP eliminates all three problems by reversing the connection direction. The Pi’s SocketXP agent dials out to the SocketXP cloud gateway over an encrypted TLS connection on port 443 (HTTPS-compatible, almost never blocked). The cloud gateway holds the tunnel open. When you initiate a VNC session, traffic flows inward through that existing outbound tunnel rather than requiring any inbound firewall hole.
Step 1: Enable VNC on Your Raspberry Pi
Option A: Raspberry Pi OS Desktop (RealVNC pre-installed)
On Raspberry Pi OS Desktop, RealVNC Server is bundled and integrable via raspi-config:
sudo raspi-config
# Navigate to: Interface Options > VNC > Enable
Alternatively, enable it directly via systemd:
sudo systemctl enable vncserver-x11-serviced
sudo systemctl start vncserver-x11-serviced
Verify that VNC is listening on port 5900:
$ ss -tlnp | grep 5900
LISTEN  0  128  0.0.0.0:5900  0.0.0.0:*  users:(("Xvnc",pid=1234,fd=7))
Option B: Raspberry Pi OS Lite (TightVNC + XFCE)
If you are running the headless Lite image, install a lightweight desktop environment and TightVNC Server:
sudo apt update
sudo apt install -y xfce4 xfce4-goodies tightvncserver
Start the VNC server once to set the access password:
vncserver
# Enter and confirm an access password when prompted
# Optionally skip the view-only password
Stop the server, configure the XFCE startup script, then restart:
vncserver -kill :1
mv ~/.vnc/xstartup ~/.vnc/xstartup.bak
printf '#!/bin/bash\nxrdb $HOME/.Xresources\nstartxfce4 &\n' > ~/.vnc/xstartup
chmod +x ~/.vnc/xstartup
vncserver :1
TightVNC listens on port 5901 for display :1. Adjust the SocketXP connect command accordingly in Step 3.
Step 2: Install and Configure the SocketXP Agent on Raspberry Pi
SocketXP is a cloud-based IoT Remote Access and device management platform that creates secure SSL/TLS reverse proxy tunnels to devices behind NAT routers, firewalls, or CGNAT—without any router configuration changes.
Step 2.1: Download and Install
Follow the download and install instructions to install the SocketXP agent on your Raspberry Pi. The agent binary is available for arm (32-bit, Pi Zero / Pi 2 / Pi 3) and arm64 (64-bit, Pi 4 / Pi 5).
Step 2.2: Get Your Authentication Token
Sign up at the SocketXP Web Portal and retrieve your authentication token.
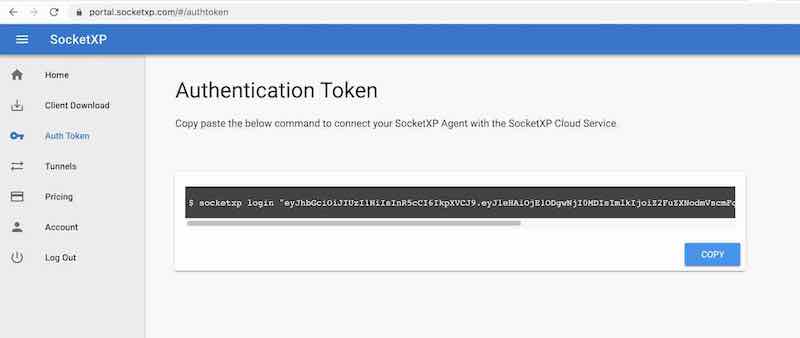
Authenticate the agent:
$ socketxp login [your-auth-token-goes-here]
Step 2.3: Create the VNC Tunnel
For RealVNC on port 5900 (Raspberry Pi OS Desktop):
$ socketxp connect tcp://localhost:5900

Connected to SocketXP Cloud Gateway.
Access the TCP service securely using the SocketXP agent in IoT Slave Mode.
For TightVNC on port 5901 (Lite + XFCE setup):
$ socketxp connect tcp://localhost:5901

Connected to SocketXP Cloud Gateway.
Access the TCP service securely using the SocketXP agent in IoT Slave Mode.
Security note: SocketXP does not create a publicly accessible TCP endpoint. The tunnel is private—only accessible via the SocketXP agent in slave mode using your auth token, or via the SocketXP portal. Port scanners cannot enumerate or reach your VNC port.
Run SocketXP as a systemd Service
For persistent VNC tunneling across reboots, configure the SocketXP agent as a systemd service. The SocketXP portal’s single-touch installation command handles this automatically.
Step 3: Set Up SocketXP Slave Mode on Your Access Device
On the machine you will use to connect (laptop or desktop), install the SocketXP agent and run it in slave mode to create a local proxy that forwards to the Pi’s VNC port.
$ socketxp connect tcp://localhost:10000 \
    --iot-slave \
    --peer-device-id "your-raspberry-pi-device-id" \
    --peer-device-port 5900 \
    --authtoken your-auth-token

Listening for TCP connections at:
Local URL -> tcp://localhost:10000
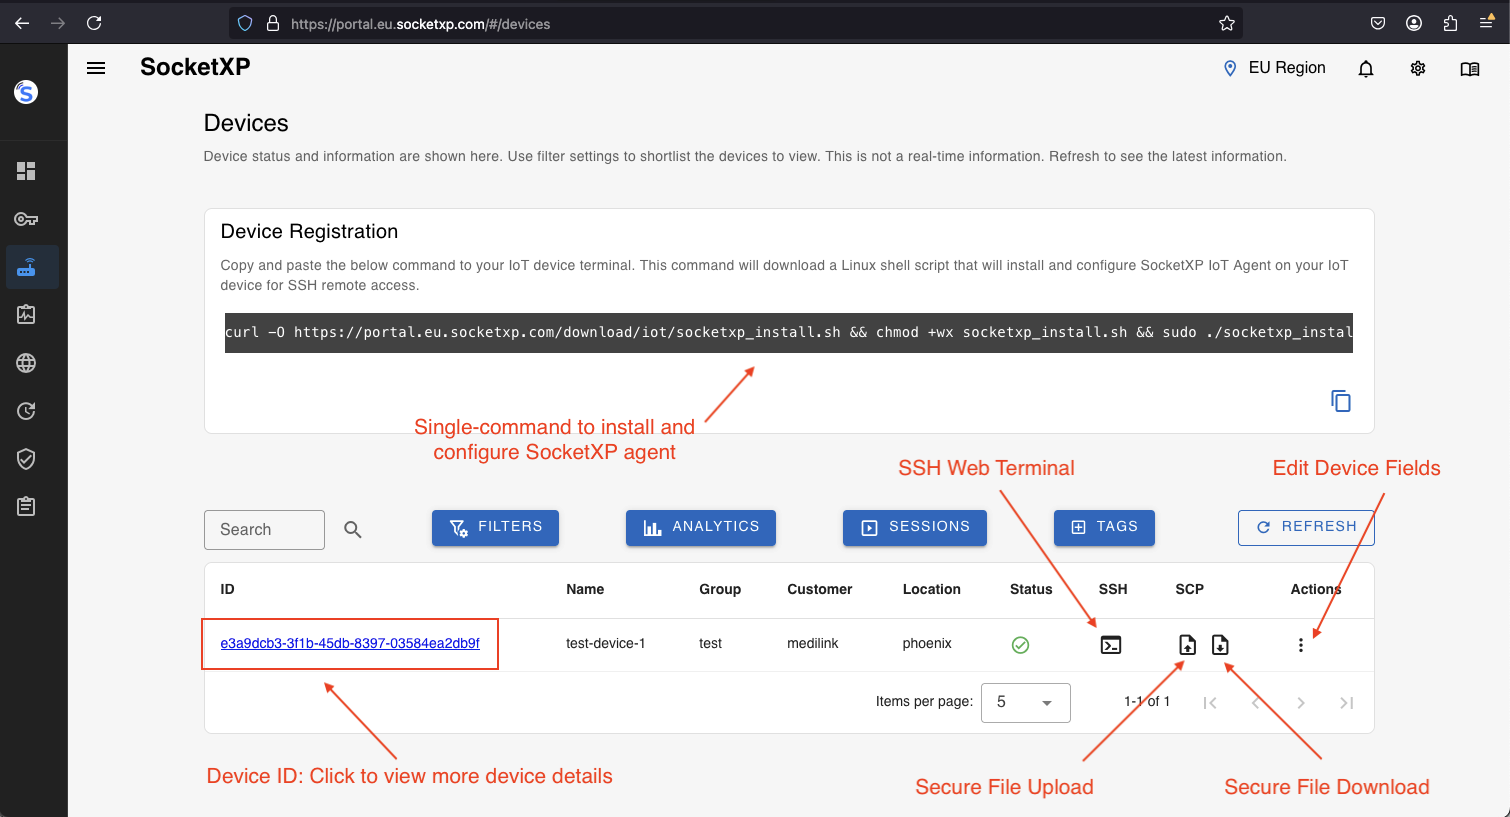
Find your Raspberry Pi’s device ID in the SocketXP Portal under Devices.
For TightVNC on port 5901, replace --peer-device-port 5900 with --peer-device-port 5901.
Step 4: Connect via VNC Viewer
With the SocketXP slave mode proxy running locally on port 10000, open your VNC viewer and connect to localhost:10000.
TightVNC Viewer (Windows)
Download TightVNC Viewer from the TightVNC website.
Launch TightVNC Viewer, enter localhost:10000 as the remote host, and click Connect.
Enter your VNC password when prompted. The Raspberry Pi desktop appears in the viewer window.
RealVNC Viewer (Windows / Mac / Linux)
Open RealVNC Viewer, enter localhost:10000 in the address bar, and press Enter. Authenticate with your VNC password.
macOS Built-in Screen Sharing
On macOS, open Finder > Go > Connect to Server, enter vnc://localhost:10000, and click Connect.
How SocketXP Optimizes Raspberry Pi VNC Access
| Concern | Traditional VNC + Port Forwarding | SocketXP VNC Tunnel |
|---|---|---|
| Router configuration | Required (open port 5900/5901 inbound) | Not required |
| Works behind CGNAT | No | Yes |
| Static IP required | Yes (or dynamic DNS) | No |
| VNC port exposed to internet | Yes (visible to port scanners) | No (private tunnel) |
| Encryption layer | VNC password only (weak) | SSL/TLS 1.3 outer tunnel + VNC auth |
| Fleet management | Manual per-device setup | Centralized portal, single auth token |
Unlike ngrok, SocketXP is purpose-built for IoT and embedded Linux fleets—the agent runs as a persistent systemd service, survives reboots, reconnects automatically on network disruptions, and supports multi-device management from a single portal without session time limits.
Why SocketXP Outperforms Tailscale and ngrok for Raspberry Pi VNC Access
Engineers evaluating VNC remote access tools for Raspberry Pi often consider Tailscale and ngrok alongside SocketXP. Here is how they compare for IoT use cases:
| Criterion | ngrok | Tailscale | SocketXP |
|---|---|---|---|
| Architecture | Reverse proxy tunnel | Peer-to-peer mesh VPN | Secure reverse proxy tunnel |
| IoT fleet management | No | No | Yes — centralized device portal |
| Remote OTA updates | No | No | Yes |
| Device health monitoring | No | No | Yes |
| Works behind CGNAT | Yes | Yes (DERP relay) | Yes |
| Session time limits | Yes (free tier) | No | No |
| Scales to 10,000+ devices | Not designed for this | Mesh becomes complex | Native IoT architecture |
| VPN client on access device | No | Required | Optional (slave mode) |
| Browser-based VNC/SSH | No | No | Yes |
| Resource footprint on Pi | Low | Moderate (kernel module) | Minimal (userspace binary) |
ngrok is a developer tunneling tool optimized for exposing local web servers during development. It is not designed for managing IoT device fleets, does not support OTA updates or remote monitoring, imposes session time limits on the free tier, and offers no device management portal. It works well for short-lived developer use cases but is not suitable for production IoT deployments.
Tailscale creates a mesh VPN between devices. While reliable for small private networks, it requires installing a VPN client on every access device and becomes operationally complex when managing thousands of IoT nodes. It provides no IoT-specific features — no OTA firmware updates, no device health monitoring, no fleet management portal, and no browser-based access terminal.
SocketXP is a purpose-built IoT Remote Access and Device Management platform designed to scale to tens of thousands of Raspberry Pi and embedded Linux devices. The agent is a lightweight userspace binary that consumes minimal CPU and RAM — suitable even for constrained devices like Raspberry Pi Zero W. Access requires no VPN client on the engineer’s device; the SocketXP web portal provides browser-based SSH and device management from anywhere.
Security and Production Best Practices
- Disable the VNC password fallback on RealVNC and configure UNIX authentication or SSO where supported.
- Enforce SSH key authentication on the Raspberry Pi and disable password-based SSH login to prevent brute-force attacks on the SSH layer.
- Use RBAC in the SocketXP portal to restrict which team members can access which Raspberry Pi devices via VNC.
- Rotate your SocketXP auth token periodically; revoke tokens for decommissioned devices immediately.
- Run VNC on a non-default display (e.g.,
:2→ port 5902) to reduce exposure in the rare case a tunnel misconfiguration occurs. - Monitor VNC session logs on the Pi (
journalctl -u vncserver-x11-serviced) for unauthorized connection attempts. - Keep Raspberry Pi OS and VNC server packages updated via
sudo apt update && sudo apt upgradeto patch known CVEs.
Conclusion
Remote access to a Raspberry Pi desktop via VNC over the internet is a reliable workflow for GUI-dependent tasks—running IDEs, dashboards, configuration tools, or desktop applications—without needing physical access to the device.
SocketXP’s outbound tunnel architecture makes this possible even when the Pi is behind restrictive NAT, CGNAT, or corporate firewalls, with no router changes, no static IP requirements, and no open inbound ports. The VNC session travels through an encrypted SSL/TLS tunnel end-to-end, and the SocketXP portal provides centralized access control for managing fleets of Raspberry Pi devices.
For SSH, headless setup, web app tunnels, and platform-specific guides, see the complete Raspberry Pi remote access solution page.
Frequently Asked Questions
Can I access Raspberry Pi desktop via VNC without port forwarding?
Yes. SocketXP creates a secure outbound SSL/TLS tunnel from the Raspberry Pi to the SocketXP cloud gateway. No inbound ports need to be opened on your router. Your VNC session travels through this tunnel, completely bypassing NAT and firewall restrictions.
Does Raspberry Pi VNC remote access work over cellular or Starlink?
Yes. SocketXP's outbound tunnel architecture works on any internet connection including 4G/5G cellular and Starlink satellite. Carrier-grade NAT (CGNAT) is not an obstacle because the Pi initiates the connection outbound.
Which VNC server should I use on Raspberry Pi?
Raspberry Pi OS Desktop (full image) ships with RealVNC Server pre-installed and pre-configured. For Raspberry Pi OS Lite, install TightVNC Server after adding a desktop environment (XFCE or LXDE). Both work identically with the SocketXP tunnel.
Can I use RealVNC Viewer to connect to Raspberry Pi via SocketXP?
Yes. Any standard VNC viewer—RealVNC Viewer, TightVNC Viewer, TigerVNC, or the built-in VNC client on macOS—works when pointed at the SocketXP local proxy endpoint on your laptop.