
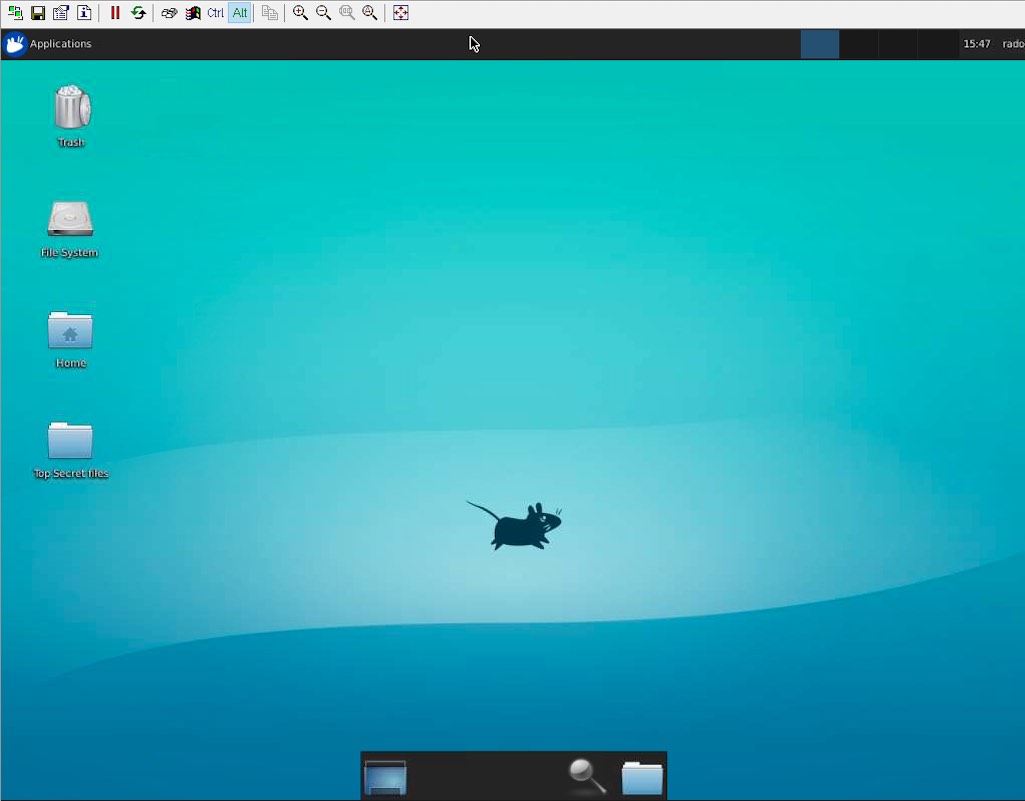
When it comes to accessing a Raspberry Pi’s graphical desktop from a Windows machine, xRDP is the most seamless choice — Windows Remote Desktop Connection is built-in on every Windows 10 and 11 machine, while VNC requires a separate viewer download. The challenge, as with all Raspberry Pi remote access scenarios, is that the Pi sits behind a NAT router or CGNAT with no public-facing RDP port, making direct connection from the internet impossible without port forwarding.
Raspberry Pi xRDP remote desktop in 4 steps:
- Install xRDP on the Pi:
sudo apt install xrdp && sudo systemctl enable --now xrdp(port 3389) - Install SocketXP on the Pi and run
socketxp connect tcp://localhost:3389 - Run SocketXP in slave mode on your Windows PC or Mac to create a local proxy on
localhost:3000 - Open Remote Desktop Connection (Windows) or Microsoft Remote Desktop (Mac), connect to
localhost:3000
No port forwarding, no static IP, no VPN — the SocketXP tunnel handles NAT and CGNAT transparently.
What is xRDP and Why Use It on Raspberry Pi?
RDP (Remote Desktop Protocol) is a network protocol developed by Microsoft for graphical remote desktop sessions. It is built into Windows as Remote Desktop Connection (RDC) and is available natively on macOS via Microsoft Remote Desktop.
xRDP is the open-source Linux implementation of RDP. It runs on your Raspberry Pi as a server, accepting incoming RDP connections and rendering the Pi’s desktop to the connecting client. This means:
- Windows users can connect using the built-in Remote Desktop Connection — no third-party software
- Mac users can use the free Microsoft Remote Desktop app from the Mac App Store
- Linux users can use Remmina or any other RDP client
Compared to VNC, xRDP typically provides a more responsive and integrated experience on Windows, since RDP was designed for that ecosystem.
The Core Challenge: Port 3389 Is Not Reachable from the Internet
xRDP listens on TCP port 3389 on the Raspberry Pi’s local IP address. From outside the Pi’s network:
- The Pi’s private IP (
192.168.x.x) is not internet-routable - Port 3389 is not forwarded through the router (and may be impossible with CGNAT)
- Opening port 3389 to the internet is a significant security risk — RDP is one of the most frequently brute-forced protocols on the internet
- Corporate and campus firewalls routinely block inbound port 3389
SocketXP resolves this by reversing the connection. The Pi’s SocketXP agent dials outbound SSL/TLS reverse proxy tunnel to the SocketXP cloud gateway over port 9443 (or optionally, port 80). Your access device then connects inward through that existing tunnel — no port 3389 is ever exposed to the internet.
Step 1: Set Up a Desktop Environment on Raspberry Pi
Raspberry Pi OS Desktop (Full Image) — Skip This Step
If you are running Raspberry Pi OS Desktop (the full image), a desktop environment is already installed and running. Proceed directly to Step 2.
Raspberry Pi OS Lite — Install XFCE
If you are running Raspberry Pi OS Lite (headless, no desktop), install a lightweight desktop environment first:
sudo apt update
sudo apt install -y xfce4 xfce4-goodies
XFCE is recommended for Raspberry Pi because it is lightweight and runs well on all Pi models including Pi Zero 2W and Pi 3.
Step 2: Install and Configure xRDP on Raspberry Pi
Install xRDP
sudo apt update
sudo apt install -y xrdp
Start and Enable xRDP
sudo systemctl start xrdp
sudo systemctl enable xrdp
sudo systemctl status xrdp
Verify xRDP Is Listening on Port 3389
$ ss -tlnp | grep 3389
LISTEN  0  10  0.0.0.0:3389  0.0.0.0:*  users:(("xrdp",pid=1234,fd=7))
Configure xRDP to Use XFCE (Lite Image Only)
If you installed XFCE in Step 1, configure xRDP to launch it:
echo "startxfce4" > ~/.xsession
sudo systemctl restart xrdp
Test Locally (Optional)
Confirm xRDP works on your local network before setting up the remote tunnel. From a device on the same network, open Remote Desktop Connection and enter the Pi’s local IP address (e.g., 192.168.1.42) with port 3389.
Step 3: Install the SocketXP Agent on Your Raspberry Pi
SocketXP is a cloud-based IoT Remote Access and device management platform that creates secure SSL/TLS reverse proxy tunnels — letting you reach any TCP service on the Pi from anywhere, without opening inbound firewall ports.
Step 3.1: Download and Install
Follow the download and install instructions to install the SocketXP agent on your Raspberry Pi. The agent supports arm (32-bit) and arm64 (64-bit) for all Pi models.
Step 3.2: Get Your Authentication Token
Sign up at the SocketXP Web Portal and retrieve your authentication token.
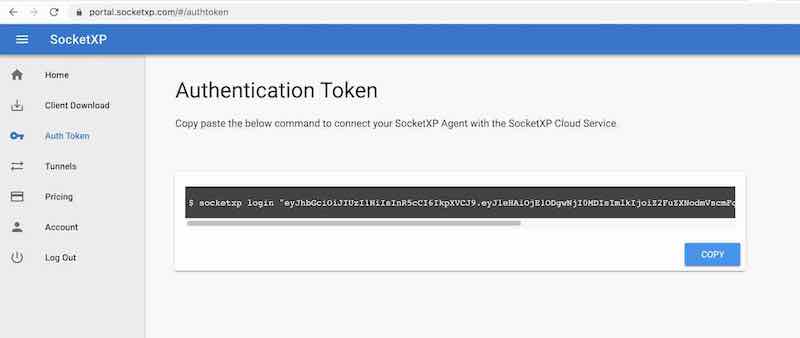
Authenticate the agent:
$ socketxp login [your-auth-token-goes-here]
Step 3.3: Create the xRDP Tunnel
$ socketxp connect tcp://localhost:3389

Connected to SocketXP Cloud Gateway.
Access the TCP service securely using the SocketXP agent in IoT Slave Mode.
Your Raspberry Pi now appears in the SocketXP portal Devices list.
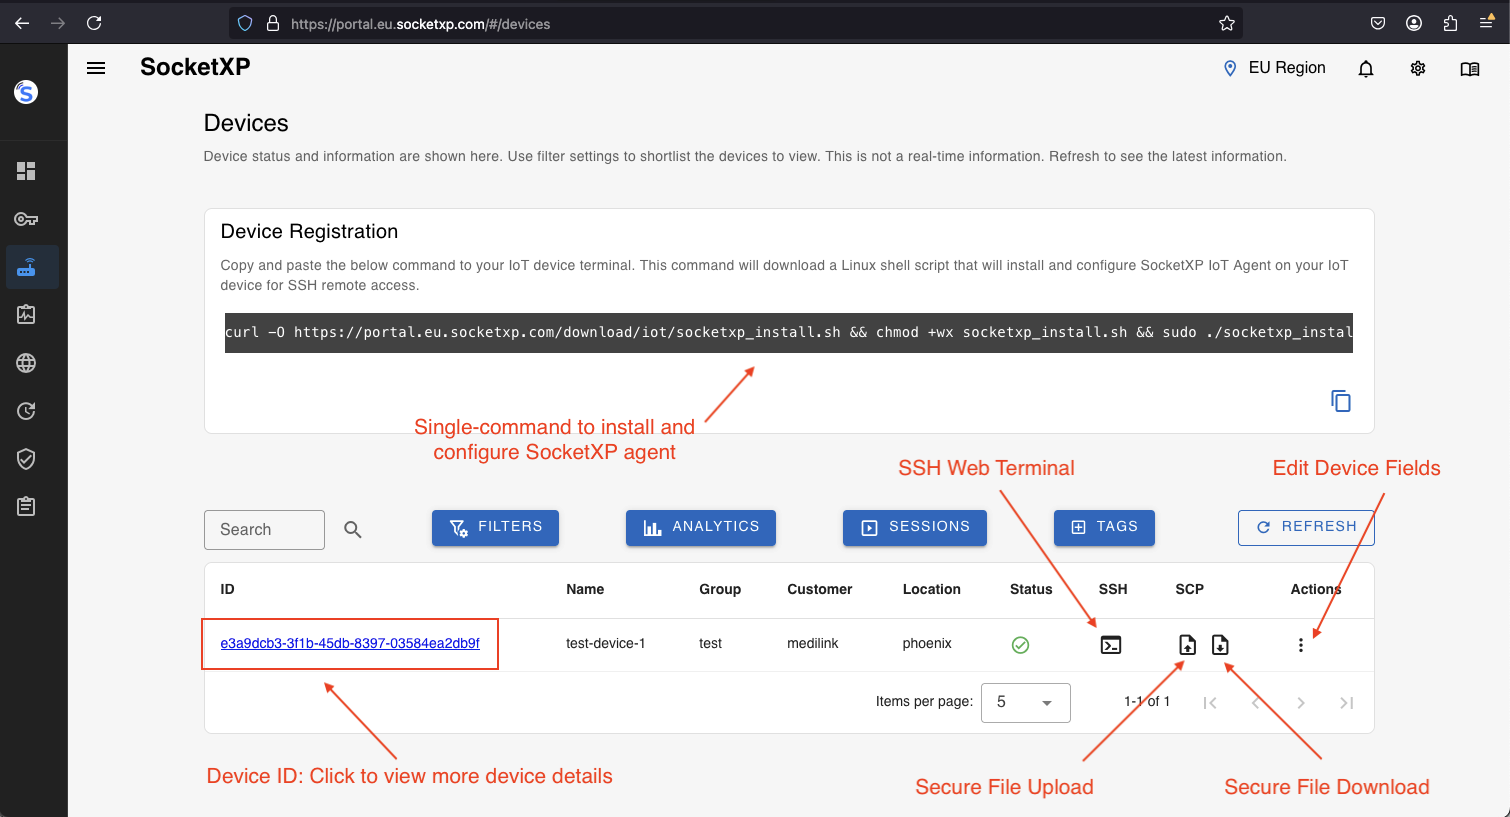
Security note: SocketXP does not expose port 3389 to the public internet. The tunnel endpoint is private — accessible only via the SocketXP agent in slave mode using your auth token. Port scanners cannot discover or reach your Pi’s RDP port.
Run SocketXP as a systemd Service
For persistent tunneling across reboots, configure SocketXP as a systemd service using the single-touch installation command from the SocketXP portal. This ensures the RDP tunnel is always available when the Pi is powered on.
Step 4: Set Up SocketXP Slave Mode on Your Access Device
On the Windows PC or Mac you will use to connect, install the SocketXP agent and run it in slave mode to create a local TCP proxy to the Pi’s xRDP port.
$ socketxp connect tcp://localhost:3000 \
    --iot-slave \
    --peer-device-id "your-raspberry-pi-device-id" \
    --peer-device-port 3389 \
    --authtoken your-auth-token

Listening for TCP connections at:
Local URL -> tcp://localhost:3000
Find your Raspberry Pi’s device ID in the SocketXP portal under Devices.
SocketXP now listens on localhost:3000 on your access device. Any RDP connection to that port is securely tunneled to port 3389 (xRDP) on your Raspberry Pi.
Step 5: Connect to Raspberry Pi Remote Desktop
From Windows — Remote Desktop Connection (Built-in)
Windows 10 and Windows 11 include Remote Desktop Connection (RDC). No third-party software needed.
- Press
Win + R, typemstsc, press Enter — or search “Remote Desktop Connection” in the Start menu - In the Computer field, enter:
localhost:3000 - Click Connect
- Enter your Raspberry Pi username and password when prompted
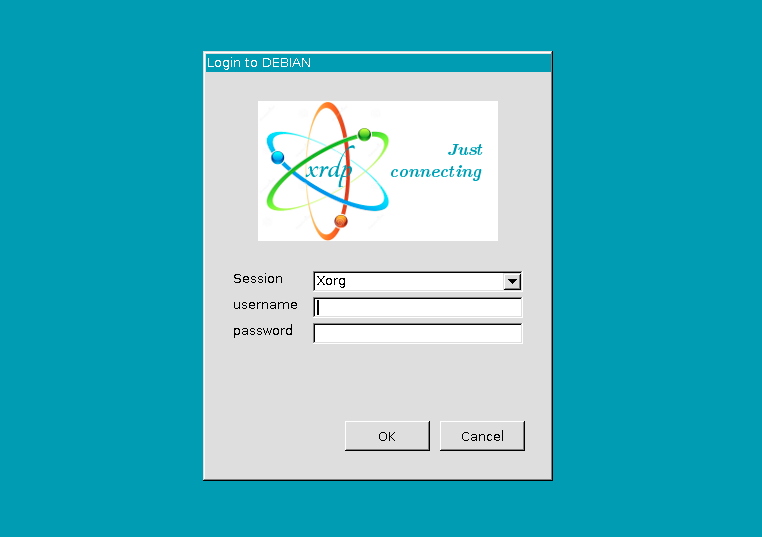
The Raspberry Pi desktop appears in your Windows RDP session.
From Mac — Microsoft Remote Desktop
- Install Microsoft Remote Desktop from the Mac App Store (free)
- Click Add PC, set PC name to
localhost:3000 - Under User account, add your Raspberry Pi username and password
- Double-click the connection to launch
From Linux — Remmina
sudo apt update && sudo apt install remmina
Open Remmina, create a new connection with protocol RDP, server localhost, port 3000, and your Pi credentials.
What You See After Connecting
Once connected, you have a full graphical session on your Raspberry Pi — the complete XFCE or Raspberry Pi OS desktop. You can run applications, edit files, open a terminal, configure settings, and perform any task you would do in person.
xRDP vs VNC for Raspberry Pi Remote Desktop
Both xRDP and VNC provide graphical desktop access to a Raspberry Pi. The right choice depends on your use case:
| Criterion | xRDP | VNC (RealVNC / TightVNC) |
|---|---|---|
| Windows client | Built-in (RDC) — no install | Requires VNC viewer download |
| Mac client | Microsoft Remote Desktop (free, App Store) | Built-in Screen Sharing or VNC viewer |
| Linux client | Remmina | Many options (Remmina, TigerVNC, etc.) |
| Protocol | Microsoft RDP | VNC protocol |
| Performance on Windows | Generally smoother | Good, but more bandwidth |
| Audio redirection | Supported | Limited |
| Multi-monitor support | Yes | Limited |
| Pre-installed on Pi OS Desktop | No (install needed) | RealVNC pre-installed |
For Windows-primary teams, xRDP is the better choice — no software to install on the Windows side. For cross-platform teams (Windows + Mac + Linux + mobile), VNC is more universal. Both work identically with SocketXP’s tunnel.
Why SocketXP Outperforms Tailscale and ngrok for Raspberry Pi xRDP Access
| Criterion | ngrok | Tailscale | SocketXP |
|---|---|---|---|
| Works behind CGNAT | Yes | Yes (DERP relay) | Yes |
| RDP session time limits | Yes (free tier) | No | No |
| IoT fleet management | No | No | Yes |
| OTA firmware updates | No | No | Yes |
| Device monitoring | No | No | Yes |
| Scales to 10,000+ Pi devices | Not designed for IoT | Mesh complexity | Native IoT architecture |
| VPN client on access device | No | Yes | No |
| Lightweight agent on Pi | Yes | Moderate (kernel VPN) | Minimal userspace binary |
ngrok is a developer tunneling tool — it is not designed for persistent xRDP sessions or IoT fleet management. Free tier sessions time out and URLs change on restart.
Tailscale requires installing a VPN client on every Windows PC or Mac that needs to connect to the Pi. For field engineers or support staff using personal machines, this is impractical. Tailscale also provides no IoT-specific features.
SocketXP requires no VPN client on the access device — only the lightweight slave mode agent to create a local proxy, and SocketXP then manages the secure tunnel. As an IoT Remote Access and Device Management platform, it scales to tens of thousands of Raspberry Pi devices with centralized SSH, xRDP, OTA updates, monitoring, and RBAC from a single portal.
Security Best Practices
- Never expose port 3389 to the internet directly — RDP is one of the most heavily attacked protocols online; SocketXP’s tunnel keeps it private
- Use strong passwords for your Raspberry Pi user account, as these are the RDP credentials
- Disable unused accounts — only the accounts that need xRDP access should be active on the Pi
- Keep xRDP and Raspberry Pi OS updated (
sudo apt update && sudo apt upgrade) to patch known xRDP vulnerabilities - Use SocketXP RBAC to restrict which team members can access the Pi’s xRDP session
- Run SocketXP as a systemd service to ensure the tunnel auto-reconnects after reboots and network disruptions
- Monitor xRDP logs via
journalctl -u xrdpfor suspicious login attempts
Conclusion
Remote desktop access to a Raspberry Pi over the internet is practical and secure with the xRDP + SocketXP combination. xRDP provides a full graphical desktop session compatible with Windows RDC, Microsoft Remote Desktop on Mac, and Remmina on Linux. SocketXP’s outbound tunnel eliminates the need for port forwarding, a static IP, or a VPN — making xRDP accessible from anywhere, even behind CGNAT.
For the complete Raspberry Pi remote access solution — SSH, VNC, xRDP, web apps, headless setup, and platform-specific guides — see the full SocketXP solution page.
Frequently Asked Questions
How do I access Raspberry Pi remote desktop over the internet without port forwarding?
Install xRDP on your Raspberry Pi, then install the SocketXP agent and run 'socketxp connect tcp://localhost:3389'. SocketXP creates a secure outbound tunnel. On your access device, run SocketXP in slave mode to create a local proxy, then connect your RDP client (Windows Remote Desktop Connection or Microsoft Remote Desktop on Mac) to localhost on the proxy port.
What is the difference between xRDP and VNC for Raspberry Pi remote desktop?
Both provide graphical desktop access. xRDP uses Microsoft's Remote Desktop Protocol (RDP) and is natively compatible with Windows Remote Desktop Connection—no extra client software needed on Windows. VNC uses its own protocol and requires a VNC viewer on all platforms. xRDP generally provides a smoother experience on Windows; VNC is more universal across platforms.
Does Raspberry Pi xRDP remote access work behind CGNAT?
Yes. SocketXP's outbound tunnel architecture works even when your ISP uses carrier-grade NAT (CGNAT). The Raspberry Pi initiates the outbound TLS connection to SocketXP's cloud gateway, bypassing CGNAT and firewall restrictions without any router configuration.
Can I access Raspberry Pi desktop from Windows without installing extra software?
Yes. Windows 10 and Windows 11 include Remote Desktop Connection (RDC) built-in. With SocketXP slave mode running on your Windows machine creating a local proxy, open RDC, enter 'localhost:3000', and you get the Raspberry Pi desktop—no third-party RDP client required.
Do I need a full Raspberry Pi OS Desktop image for xRDP remote access?
No. You can use Raspberry Pi OS Lite and install a desktop environment (XFCE or LXDE) manually, then install xRDP on top of it. Alternatively, Raspberry Pi OS Desktop (full image) already includes a desktop environment, so you only need to install xRDP.